| “ | I'm gettin' through this. Let's just take it easy. See what happens when it's all over... | ” |
— Jayden to himself in one of the endings | ||
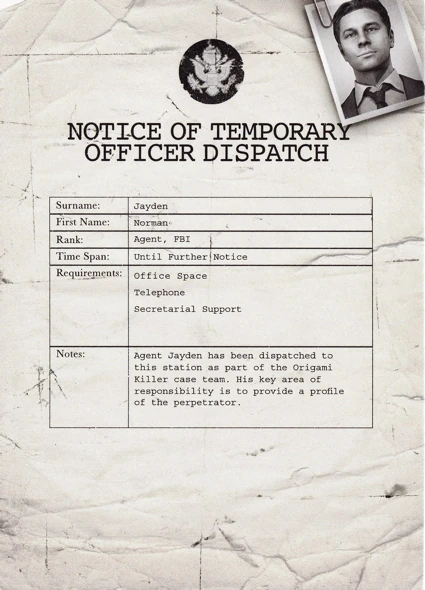
Agent Norman Jayden is one of the main protagonists and four playable characters (the other three being Ethan Mars, Scott Shelby, and Madison Paige) in Heavy Rain.
Jayden is a dedicated and thorough member of the FBI, sent to aid the police force with the investigation of the Origami Killer. He uses an experimental device called the ARI (Added Reality Interface), which allows him to investigate crime scenes and analyze evidence in an efficient way. He also struggles against his addiction to a fictional drug called Triptocaine and withdrawal.
Norman Jayden is voiced by and modeled after Leon Ockenden.
Background
As with most other characters in the game (excluding Scott Shelby), little to nothing is known about Jayden's life prior to the events of the game. He is sent by FBI headquarters in Washington, D.C. to help with the Origami Killer case. In addition to being an acclaimed FBI profiler, he also possesses a degree in criminal psychology. Jayden uses Triptocaine to counteract the effects of the ARI glasses but develops an addiction to it. It is unknown how he got the scar on his right cheek. Insight on Jayden's past life and said subjects were originally intended to be explained in his episode of the Heavy Rain Chronicles; while one episode has been released, the development of the Heavy Rain Chronicles has been put on indefinite hiatus. From what little we currently know, Jayden lost his partner in the FBI at some point, which may have been further explored in his Heavy Rain Chronicles episode.
Jayden's partner for most of the game is Carter Blake, a harsh-spoken and brutal police lieutenant who Jayden will gradually come to despise.
Personality
Jayden is an intelligent and dedicated FBI profiler who uses his wits instead of his instincts in order to solve crimes.
He is also somewhat asocial and appears as if he is not completely used to socializing with others outside of his duties as an investigator (evidenced by his awkwardness at small talk in his first chapter). He comes across as sympathetic, appearing to understand people due to his knowledge of psychology and is noticeably distraught if he is forced to kill someone. Jayden appears somewhat lonely; unlike the other characters, he doesn't seem to have any family or friends, nor does he have a love life.
In the game, his only concern is saving Shaun Mars. In fact, if Shaun is saved (but not by him), then he will actually resign from the FBI (hinting a high level of sympathy for the boy). If Shaun drowns, Jayden's guilt and Triptocaine addiction will overwhelm him, killing him in the epilogue.
Although Jayden is usually calm and restrained, he can have a bit of a temper and often lashes out at those who provoke him. In certain dialogue choices, he can be seen as sarcastic. By the latter half of the game, he shows that he is not above using force or threatening others if provoked, evidenced by him grabbing Paco's bodyguard at the Blue Lagoon when he refuses to answer his question, or when he interrogates Jackson Neville (during which he can threaten to shoot the gasoline barrels and ignite them, or hit Jackson in the nose, breaking it). He appears to dislike being reprimanded by his higher-ups, as seen if he accuses Blake of being the killer and tries to quietly defend himself from Leighton Perry before storming out of his office in anger.
Jayden also seems to be a pianist, as evident in the chapter "Jayden Blues." However, it is possible that he is simply assisted by his glasses as opposed to having any real talent.
He is very experienced in fighting as he can kill Mad Jack and the Origami Killer quite easily without obtaining any bleeding or swelling wounds.
Character Information
Norman specializes in conducting forensic investigations with an experimental device called ARI. ARI's main hardware component is a pair of sunglasses, which acts as a type of transparent display. When looking at a crime scene through ARI's interface, relevant data and analysis is superimposed on the image of the crime scene above the relevant clues. Norman uses ARI to highlight relevant clues within a specified "pulse" radius. Norman also wears ARI's other hardware component, a glove, which allows him to interact with the virtual data displayed through the glasses. By simultaneously using these two items, ARI catalogues all the data and cross-references it with relevant databases, analyses it, and geo-locates it where applicable. ARI also has a recording feature that works as a video camera. When being worn, it records what the wearer of the sunglasses sees and stores it in its databases for future reference. Norman constantly reviews his clues and data that he has collected via ARI.
With the local cops resentful of both his methods and his very presence, he struggles to piece together the evidence before it becomes too late for the next victim of the Origami Killer.
Norman is addicted to Triptocaine, also known as Tripto, a powdery blue substance in a vial. Triptocaine is a drug Norman uses which was given to him by the distributors of his ARI glasses to combat the glasses' side effects, and it is currently unknown (and never entirely explained in the narration or otherwise) whether he is using it to counter-balance side-effects of overusing the ARI, or for some other purpose. Additionally, the true source of the symptoms (nosebleeds, paleness of complexion, internal pain, dizziness, bloodshot eyes, tremors, etc.) Norman experiences is left rather ambiguous - whether these symptoms are caused by the ARI or Triptocaine is left to individual speculation. Throughout the game, the player has the choice of whether to be complicit in Norman's addiction or steer him away from it in various circumstances as he tries to solve the case of the Origami Killer. However, twice in the game Jayden will take Triptocaine without the player's input.
Events of Heavy Rain
Norman first appears in the fifth chapter of the game, "Crime Scene," in which he first meets Carter Blake and investigates the newest victim of the Origami Killer, Jeremy Bowles. He is later better introduced to the cops in "Welcome, Norman" where he meets Leighton Perry and first meets Ethan Mars (if he didn't take Triptocaine, which he had the option of taking). He will then present his profile of the killer to Blake and Perry in "Kick Off Meeting," where his dispute with Blake initiates. Later, he and Blake go to Nathaniel Williams' apartment where they have even more disputes. Blake begins to resort to police brutality against Nathaniel, which greatly irritates Norman...until Nathaniel pulls out a gun. Norman must then make his first major decision: whether to shoot or spare Nathaniel.
Blake and Norman will discuss this decision in his next chapter, "Covered Market." After the discussion, the suspect, Miroslav Korda, will be confronted. He will run away as soon as he is confronted and can either be caught or not by Norman depending on the succeeded or failed QTEs. If Korda was caught, he will be interrogated (to the point of no conviction) in "Police News." Regardless of whether Korda was caught or not, Grace Mars, in the same chapter, will tell the police that Ethan has once mentioned seeing "drowning bodies in the rain" senselessly. Norman and Blake go to Ethan's psychologist in "Shrink and Punches." Regardless of Norman's actions and choices, Blake will successfully get the psychologist to reveal that Grace's claims about Ethan are true. Blake, much to Norman's annoyance and disagreement, will get every cop he can to go after Ethan, thinking he is the killer. Norman appears in Madison's chapter "Fugitive," alongside Blake, trying to arrest Ethan. Madison Paige appears and helps Ethan escape from Norman and Blake. Ethan can get arrested if Madison is not quick enough. If Ethan is arrested, Norman will break him out in "Under Arrest."
Before "Under Arrest" and/or after "Fugitive," Norman will review the evidence and find a connection to Mad Jack, and if Ethan evaded arrest, Norman will be seen in his room, suffering from Triptocaine withdrawal. Norman can resist or take Triptocaine. He then confronts Mad Jack, but he is unwilling to cooperate or help, so Norman uses ARI to look around Jack's place. He finds a human skull; Jack immediately reveals a gun and trains it directly onto Norman's head. If Norman fails to escape gunpoint, he will be shot by Mad Jack and die. If he succeeds and wins the ensuing fight, he will now hold Jack at gunpoint. He will get a confession out of Mad Jack that he did buy a car from "a guy" and that he later got that guy a new car with false plates, and that this was a cash transaction, no questions asked. He will also reveal that he was supposed to tell a guy named Paco about the car once it was finished. As Norman is about to arrest Jack, his Triptocaine addiction will kick in and his vision will start to blur. Norman now has the choice to give in and use the Triptocaine he has in one of his pockets. This will allow him to arrest Mad Jack, thus ending the chapter. If he fails, he will drop the Triptocaine vial and will be knocked out by Mad Jack. He awakes as his car is about to be dropped into a crusher, and he must escape from the car before it gets crushed. If he fails to escape, he will die; if he succeeds, he will fight Mad Jack, and one of them will be killed.
Continuing on the lead Mad Jack gave him, he will enter the Blue Lagoon in "Fish Tank" to interrogate Paco. Whilst he is walking up there, Madison Paige will walk past him if she survived in "The Doc." The Origami Killer kills Paco; then, once Norman arrives, he will fight the killer in disguise. If he fails too many QTEs, he will die. If he succeeds at enough of them, he will live, but the killer will get away.
If Ethan is arrested for the first time in "On the Loose" and Norman is still alive, he will break Ethan out in "Under Arrest." If Ethan is arrested the second time, Norman will look at him with a sad look and leave him in prison. Also, if Ethan is arrested and Norman is killed before this, Ethan will remain in prison for the rest of the game.
In "Solving the Puzzle," Norman will be completely disgruntled by the size of the puzzle, and the player must try to use ARI to get as many clues as possible to find the Origami Killer's identity. He can either:
- Fail to solve the puzzle by giving up.
- Solve the puzzle.
- Accuse Carter Blake of being the killer; this accusation is false, and will result in the player being treated as if Norman had failed the puzzle.
- Spend too much time in ARI and die of the ARI + Triptocaine addiction. He will start to bleed and eventually die.
Norman can also be called by Madison Paige in "Killer's Place" and informed of the address. Note that he cannot be called if he is killed before this.
If Norman is alive and has found the correct location, he will go to the killer's location ("The Old Warehouse"). The results of this chapter depend on whether he went alone, and whether Madison and/or Ethan made it.
- Goes alone: He will save Shaun, but then he fights Scott Shelby, in which either Norman or Scott will die.
- Goes with Ethan: Ethan is confronted by Scott, and before he shoots him, Norman appears and fights him at the conveyor belt, in which one of them will die. Ethan must save Shaun.
- Goes with Madison: Norman appears with Madison and asks if she found Shaun. Before they save him, Norman is knocked out by Scott, who tries to kill Madison, but she flees and they fight around the docks. Then Norman must save Shaun. If Madison survives the fight, Norman appears and shoots Scott. If Madison is killed, Norman leaves with Shaun safely. Alternatively, Madison is choked to death by Scott and Norman goes to the conveyor belt to fight him. Norman will either win the fight and kill Scott then save Shaun, or he will lose the fight and be killed. (Shaun also dies in this case.)
- Goes with Ethan and Madison: Ethan saves Shaun while Norman fights Scott. After the fight, Madison will have to attempt to get into the warehouse to warn Ethan about the police force; if she fails, you play as Ethan and exit the warehouse, where he is tragically shot to death in front of his son.
If Ethan goes alone and is killed while Norman is still alive, the ending news report will mention that Blake and Perry have been suspended.
Endings
Norman has the second most possible endings (4) of any character (behind Ethan, who has 7 endings). Here they are from worst to best.
- Smoking Mirror - Norman and an off-screen voice discuss his guilt over not saving Shaun in one of the ARI-simulated environments. The voice warns Norman about abusing Triptocaine, and tells him that the drug may have affected him more than he realizes. The voice is revealed to be a copy of Norman himself, either the same one as seen in Uploaded, or a hallucination created by Norman's addiction. The scene ends with Norman lying on the floor around several empty Triptocaine vials as he dies of an overdose.
- Uploaded - Blake and Perry discuss Norman's funeral, which Blake happily refuses to attend. Blake tries on Norman's ARI glasses and is shocked to find Norman himself within the virtual space, suggesting that the ARI system copied, recreated and manifested Norman's persona since he used it so much, and will watch Blake even after death.
- Case Closed - Norman will be hailed as a hero for his saving of Shaun Mars. Later, he can be seen flushing a vial of Tripto down the toilet and having hallucinations of tiny digital tanks preparing to shoot him, showing that the ARI may have caused permanent damage to his brain.
- Resignation - Norman, disappointed over his inability to find the killer despite Shaun's survival, resigns from the FBI. Though he is offered to keep his ARI glasses as they're being decommissioned, he refuses, stating that the device is "a little too compelling." Norman now is able to live a normal life after resigning from the FBI.
Chapter Appearances
- Crime Scene
- Welcome, Norman
- Kick Off Meeting
- Nathaniel
- Covered Market
- Police News (non-playable)
- Shrink and Punches
- Fugitive (non-playable)
- Jayden Blues
- Under Arrest
- Mad Jack (can be killed)
- Fish Tank (can be killed)
- On the Loose (if Ethan is arrested)
- Solving the Puzzle (can be killed)
- Killer's Place (voice, if called by Madison)
- The Old Warehouse (can be killed)
- Epilogue - Uploaded (appears as a ghost in ARI)
- Epilogue - Resignation
- Epilogue - Case Closed
- Epilogue - Smoking Mirror (killed)
People Killed
- Nathaniel Williams (if he mistakes him for having a gun or shoots instinctively)
- Jackson Neville (if he survives the fight with him after passing out from Triptocaine withdrawal)
- Scott Shelby (if he is the one who fights him and survives the fight, or shoots him if Madison Paige survives for enough time)
- Himself (if Shaun dies and he survives)
Possible Deaths
- Mad Jack - If Norman fails any QTE sequences before being prompted to take the Triptocaine, he will be shot or beaten to death by Mad Jack. If he does not take the Triptocaine and fails any of the QTE sequences that follow, he will be dropped in the crusher by Mad Jack, strangled, run over, or knocked unconscious and presumably dragged to the acid bath and killed.
- Fish Tank - If he fails any QTEs fighting the Origami Killer, he will be stabbed to death with a katana.
- Solving the Puzzle - If he takes too long in ARI, he will die due to too much exposure to ARI. It is implied that he died by choking on his own blood.
- The Old Warehouse (if Norman fights the Origami Killer) - If he fails QTEs, he will be killed by junk weapons by the Origami Killer, choked to death, bashed in the head by a hammer, or fall into the waste crusher alive. If he arrives alone, he will be shot in the head if he fails to knock the killer's gun away.
- Epilogue - Smoking Mirror - He will die of a Triptocaine overdose.
Trivia
- Norman's Japanese dub voice actor, Hiroaki Hirata, is also known for voicing Sanji in the anime One Piece.
- Norman's first name means "northerner." His last name, Jayden, means "thankful."
- Norman's zodiac sign is Leo.
- Norman is similar to Tyler Miles from Indigo Prophecy/Fahrenheit, another game made by David Cage. They both are investigators/cops, and they both seem to be addicted and dedicated to their jobs (Norman with the Origami Killer, Tyler with Lucas). Their roles as protagonists in their stories are similar as well.
- Norman is also somewhat similar to Connor from Detroit: Become Human. Both of them can deviate from what they've been assigned to do in a sense; for example, if Ethan is arrested for the first time, Norman breaks him out despite that being against the law, and Connor can show compassion towards deviants and even spare them, despite his purpose being to hunt them down and kill them if necessary. Both Norman and Connor face ridicule from members of the police departments they are assigned to work with. Connor and Norman also play similar roles as protagonists, and David Cage has since confirmed that Norman served as an inspiration for Connor's character.
- There are several hints throughout the game that Norman's rivalry with Blake and the police force is fueled by their insecurity. In "Crime Scene," Blake insists that the police won't disturb the crime scene despite not being in the FBI, and in "Kick Off Meeting," he chides Norman for being a "bureaucrat" who relies too heavily on his gadgets (suggesting that he's jealous of Norman's government job and access to advanced technology). Perry also states in one chapter that he didn't want the FBI involved until the case got bigger.
- Norman physically bears some resemblance to FBI Special Agent Fox Mulder from the television series The X-Files.
- The visual effects of the ARI, as well as Jayden's appearance while using it, may have been inspired by the style of the world and agents of The Matrix.
- Unlike Madison and Ethan, Norman has (arguably) one, two, or no good endings.
- While Norman lives and is undamaged in "Resignation," he remains disillusioned, alone, and unsuccessful. Some players, however, see his disillusionment, loneliness, and failure in this ending to be a passing negative he will grow past as he pursues another life path, and more bittersweet than negative.
- While Norman is happy and generally better off than any other ending in "Case Closed" (since he saves or helps to save Shaun Mars), he also suffers some residual damage from the ARI. Some players, however, do not view the ARI hallucinations in this ending as a sign of permanent brain damage, but rather as necessary closure and proof the ARI will not lead to Norman's death, or even that he will definitely stop using the ARI (since he is shown to be aware that the device is dangerous in spite of its usefulness) and probably be physically and mentally fine after some rehabilitation.
- It can also be argued that both "Resignation" and "Case Closed" are bad endings, leaving Norman with fewer "successful" endings than even Scott Shelby.
- In "Covered Market," Leon Ockenden actually kicked a motion camera. This was not a special effect; he really did kick it.
- Most players just call him Jayden (similar to Carter Blake, who they call Blake), while they call all of the other characters by their first names.
- Unlike the other characters, Norman doesn't like to look in the mirror. This is typical among drug abusers - not wanting to see oneself or the effects one is aware of the drugs causing.
- As the game progresses, it seems that the events of the investigation take their toll on Jayden. If he shot Nathaniel, he seems to go into depression for a while, becoming angry and withdrawn. He also starts to use more violent methods in his investigation: when a bodyguard is uncooperative in "Fish Tank," he threatens the man physically and intimidates him. This is in contrast to the start of the game, where he seems somewhat uncomfortable around people.
- According to the development team, one of the hardest animations was to make Jayden's piano playing - specifically his finger movements - look realistic.
- Norman's appearance in the final version is far more "destroyed" (due to Triptocaine use) than was planned at the beginning of development.
- Norman appears to possess several tubes of Triptocaine, based on the fact he can lose or get rid of two vials (one in "Mad Jack" and one in "Jayden Blues") and still be seen using the drug in later chapters. This is especially notable in his ending "Smoking Mirror," during which he is seen surrounded by several empty or partially empty vials.
- Norman has the second highest number of deaths of the four main characters (beaten only by Madison), although he has the highest number of chapters where dying is possible: "Mad Jack," "Fish Tank," "Solving the Puzzle," and "The Old Warehouse." He also dies in "Smoking Mirror."
- Norman can die in four chapters in a row.
- Norman is one of two characters (the other being Ethan) who will die no matter what if Shaun is not saved.
- Norman's badge number is 47023.
- Norman and Ethan Mars can cross paths four times during the game: the first time in "Welcome, Norman," where Norman can ask Ethan some questions about Shaun (but only if Norman resists taking the Triptocaine); the second time in "Fugitive," where Ethan can be caught by Norman and Blake; the third time in "Under Arrest," where Norman asks Ethan questions and assists him with his escape; and finally in either "On the Loose" where Ethan begs him to save Shaun (if he's still alive when Ethan gets arrested for the second time), or in "The Old Warehouse" where he stops Scott Shelby from shooting Ethan.
- Norman and Ethan are the first main characters who can cross paths.
- Norman can also cross paths with Madison Paige and Scott Shelby twice.
- Norman has the second greatest number of fight scenes of the four main characters (the first being Scott). He fights Nathaniel (pointing a gun at him), Korda, Mad Jack (twice), Blake (briefly, optional), and Scott Shelby (twice).
- Norman is 6' 2" (1.88 m) tall and weighs 172 lbs (78 kg).
- He is the only main character whose grave is not shown if he dies before the end of the game.
- He is also the only one who doesn't visit Charity Cross Cemetery at all.
- Norman is the only playable character who cannot be arrested or detained by police.
- The only chapters Norman appears in without Blake are "Jayden Blues," "Mad Jack," "Fish Tank," and "The Old Warehouse" (though this applies only if Ethan does not make it to the warehouse).
- Norman speaks with what seems to be an attempt at a generic Northeastern U.S. accent, but ends up as a Boston/New York hybrid. The accent has endeared him to fans as well as making him a butt of many of their jokes, some of which have gone so far as to have scenes in the game edited together to highlight it. For example, he pronounces "anything" as "ehnethin" and "Norman" as "Nahman." Leon Ockenden, Norman's voice actor, stated that he based Norman's accent on the Boston accents in the series The Departed.
- Norman is the only main character to have his name on chapters: "Welcome, Norman" and "Jayden Blues."
- Norman is playable in 13 chapters, the second fewest of the four protagonists of Heavy Rain (compared with 20 for Ethan, 16 for Scott, and 10 for Madison).
- Four of the epilogues are based around Norman.
- Two of his epilogues are good and two of his epilogues are bad, making him the only main character whose story has no neutral ending.
- He is also the only main character not to appear in any of the other three main characters' epilogues.
- As such, he is the only main character who can never appear in "Ethan's Grave."
- Norman is the second youngest character after Madison and before Scott and Ethan.
- Norman is the only playable character to have first-person view in the game. This is seen in some of his chapters.
- 12 of the game's trophies are related to his chapters.
- Despite being in the FBI, Jayden does not use a Glock 22 or a Glock 23 throughout the game. Instead, Jayden owns and uses a Beretta 92FS Inox with wooden grips as his standard carry gun, and keeps a Beretta 90-Two in his car's glove compartment.
- Jayden owns a 2006 Chevrolet Impala, the newest car of any of the playable characters.
- In the Japanese game manual, Jayden is wrongly stated to be 28 years old, while he is actually 34 years old.
- Leon Ockenden has stated that the scar on Norman's cheek is from a crazy ex-girlfriend of his who was "really into hitting him and scratching him with her nails." The next day, he walked into Quantic Dream to get his face scanned/screened for Heavy Rain, causing the scratch on it to appear on Norman's character model.
- In the bonus pack art it shows Norman using his ARI on a map that says Philadelphia, which all but confirms that the game takes place there. There is also art of him fighting Shelby on the conveyor belt.
- The ARI glasses Jayden uses heavily resemble glasses made by Vuzix, a company located in Rochester, New York, that specializes in AR glasses.
- Norman's eyes sometimes appear to be a pale green or even light gray color, though this is likely owing to lighting (especially at the warehouse, given that it is storming and the warehouse is darkened). His actor, Leon Ockenden, clearly has blue eyes. Therefore, it can be established that Norman's eyes are blue.
- In the PS4 version of Heavy Rain, Norman has thinner eyebrows and more noticeable stubble, and his eyes are a clearer shade of blue.
- In some of his later chapters, Norman appears to have a slight bruise on the left side of his forehead.
Quotes
- "Agent Norman Jayden, FBI."
- "Blake, I've had just about enough of your shit! You've been chasing this guy for what, two years, and what have you caught, huh? Nothing! Abso-fuckin-lutely nothing!"
- "Your VAST experience hasn't prevented 8 victims from being murdered!"
- "Enough fucking around! Now you're gonna tell me about the man with the blue car!"
- "Oh shit, Jack. Ain't nothing to it, just a little bit of self defense. Page 1 of the police manual: kill or be killed!"
- "I prefer to have all the information before I make a decision. I try to make rational choices when possible."
- "You're alive. He's behind bars. Everything worked out okay. So don't start busting my balls with your postmortems, okay?"
- "Oh, I'm sorry. I thought you were a tough guy. A street cop who's been through the mill. I didn't think you'd scare so easily."
- "I want to save Shaun Mars just as much as you do, but that doesn't give me all rights! So you're going to stop this shit right now!"
- "Mars is not the Origami Killer, I'd stake my life on it."
- "I haven't the faintest fuckin' idea."
- "God damn rain, I'm soaking wet."
- "Jeez, won't this rain ever let up?! I'm not coming here for vacation, that's for goddamn sure!"
- "Just say you're gonna save your son."
- "Blake, if you've got a better plan, I'm willing to listen! Don't be shy, I'm all ears!"
- "Next I'm gonna blow a hole in your face. Spill! All of it!"
- "Do you like fireworks, Jack? 'Cause I'll bet them gas tanks are gonna blow up REAL nice."
- "We'll just say it was an accident, or rather, I'll say it was an accident 'cause you won't really be able to talk, will ya, Jack?"
- "I seem to spend most of my time getting the shit kicked outta me."
- "I'll end up a basket-case if things keep going like this. That bastard nearly broke my neck!"
- "Watch my lips, asshole, 'cause I got no time to translate! Did Paco know the guy? Yes or no?"
- "We've only got a few more hours left to save Shaun Mars. There has to be a God damn clue somewhere! It's probably staring me in the face. This kid's gonna die and I'm goin' round in circles!"
- "The investigation isn't over, you have absolutely nothing on Mars!"
- "Blake, you are an unbalanced, psychopathic asshole!"
- "Lt. Blake is gonna leave our planet right now and return to the Realm of Shadows. Creature of Darkness, I do beseech you to return to the Realm of Shadows and leave our Nathaniel in peace."
- "You're not gonna kill the Anti-Christ with the revolver, Nathaniel, he's much too powerful for that."
- "Perhaps I can help you to remember. If we find out that you sold the car to the man we're looking for, you're looking at some pretty solid time inside, Jacky-boy."
- "Lt. Blake? I'm Agent Norman Jayden from the FBI. I went by your office this morning, they told me you'd be here."
- (About Blake.) "FUCK! That asshole has gone too far this time."
- "That bastard is gonna beat a confession out of Mars, he just wants a culprit even if it's the wrong guy."
- "That is NOT the way it's gonna go! I'm gonna tell the whole story to Captain Perry."
- "Blake is trying to beat a confession out of Ethan Mars. You've got to do something!
- (To Perry about Ethan.) "GODDAMN, ETHAN MARS IS INNOCENT! WE'VE GOT TO GET BACK TO LOOKING FOR SHAUN IF WE WANT TO HAVE ANY CHANCE OF FINDING HIM ALIVE!"
- "The watch they give for promotion to lieutenant! The killer is a cop!"
- "Looks like the killer is a cop...Carter Blake! That would explain the dead-end investigation and his desire to frame Ethan Mars!"
- "A cop, there's only one cop in that geoprofiling zone. Got you! He owns a warehouse on the docks. If I'm wrong, Shaun Mars is dead."
Gallery
")
")
")
")
")
")
")
")
")
")
")
")
")
")
")
")
")
")
")
")
")
")
")
")
")
")
")
")
")
")
")
")
")
")
")
")
")
")
")
")
")
")
")
")
")
")
")
")
")
")
")
")
")
")
")
")
")
")
")
")
")
")
")
")
")
")
")
")
")
")
")
")
")